


Backed by over 20 years of experience and a 99.999% network uptime with a 200% SLA guarantee.
3000+ Servers Managed
20+ Years Experience
15 000+ Satisfied Customers
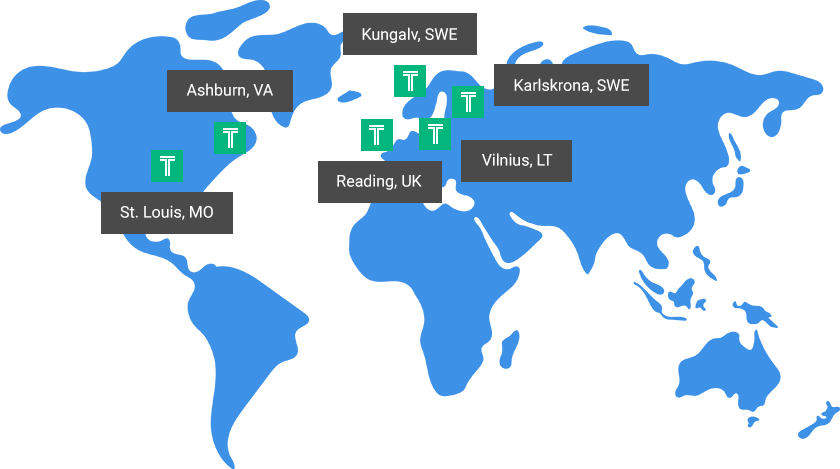
Our continually expanding data centers are strategically located across the globe to provide
uncompromising reliability and performance.
When your business requires fast, reliable hosting to support business growth, choosing the right hosting partner is crucial. Our goal is to earn your business every month by offering powerful solutions backed by impeccable customer service you can always rely on.
Plus, our solutions can scale as your business grows and we’ll guide you along every technological hurdle along the way. Discover why our customers say
"I wish I would have found you first!"


Hostek runs some of the fastest servers available. Customers are delighted to find the increase in speed on our servers.
Our 24/7 US based support team leads the industry in customer satisfaction. Whether you have a single server or a full infrastructure, our team is here for you.
Your server can grow with your needs at any time by upgrading to a bigger package or adding a specific resource – all with zero downtime.

You have the option to split your application or web site and database onto different servers to achieve overall performance improvements.
We can enable a free vLAN for you to handle your data securely to or from the database server via a vLAN from the application/web server.
By load balancing your servers, you can achieve even greater uptime by being able to reboot for security patches without bringing down your site or application.
Get a solution designed for your specific needs, optimized for performance, reliability, security, and of course, your business objectives.
Geo-Failover helps you further protect your application servers by having your application servers in two (or more) different data center locations.
As your strategic IT partner, we provide best-practice suggestions and server or performance recommendations to help your business succeed.

Are you tired of slow and non-existent tech support? Our US-based support team responds in minutes.

Your uptime is ensured by a redundant infrastructure, 24/7 monitoring, and a money-back guarantee.

Enjoy new hardware and resources without the stress and hassle of downtime or unnecessary migrations.

We proactively apply security patches to servers, solving IT disasters before they happen.

Whether your site is read heavy or write heavy, we have a solution for you.

From startups to enterprises – we provide solutions as simple or as complex as your organization needs.


